A few weeks ago, I got to shoot my cousin Taylor for her health and fitness account, @tayshealth. Shooting outside in the late afternoon, it was a great exercise in experimenting with light.
Here, I have some examples of how the direction of light can alter the photo completely. First, there are a few rules I followed to set up the basic camera settings for this lighting:
Avoid using an ISO above 400. There is typically enough bright, natural light to keep the light sensitivity of the camera low. A higher ISO results in more grain.
An aperture of f/5.6 is a good place to start. This is a low aperture that gives you a shallower depth of field. Additionally, it helps you avoid an over-exposed photo.
Experiment with LOTS of angles. Especially if you are unfamiliar with the particular subject you are using. The angle of the subject can make or break whatever lighting you are using.
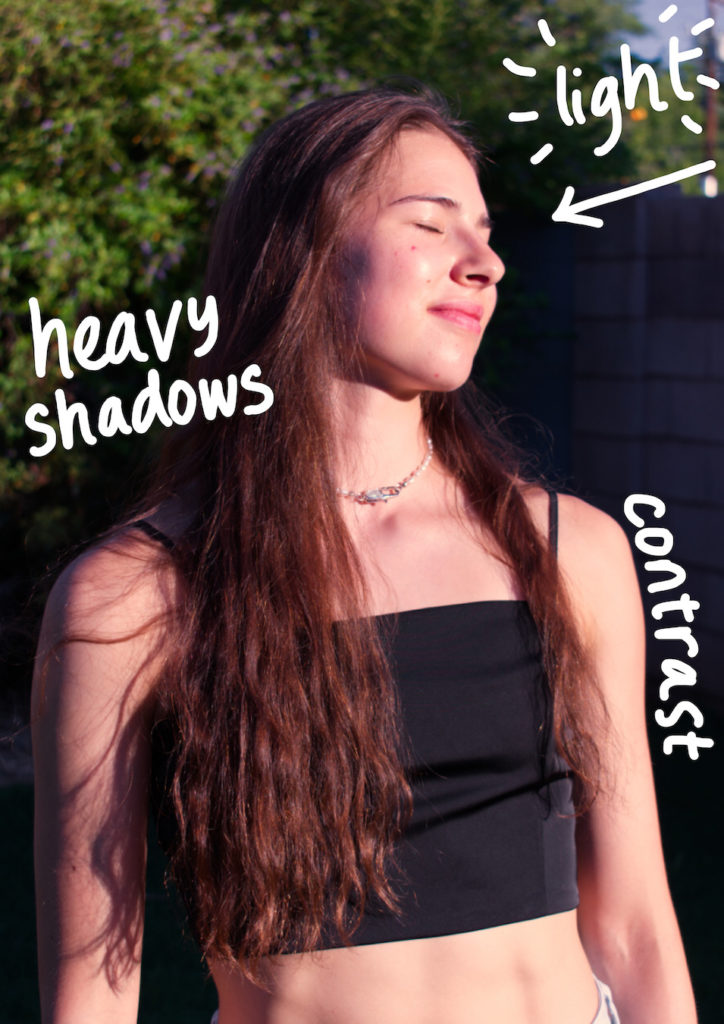
Harsh, Direct Light
ISO 100, f/5.6, 1/500
In this photo, I had Tay stand in direct sunlight. This was taken before “golden hour”, where the shadows are soft and the light has an even glow. The setting sun here is narrow and bright, leaving harsh shadows. The background is completely shaded, which offers strong contrast, making Taylor stand out as the subject.
The shadows also work to the advantage of the composition of the photo. The contrast on the right side creates a beautiful silhouette. The heavy shadows on the left side add texture.
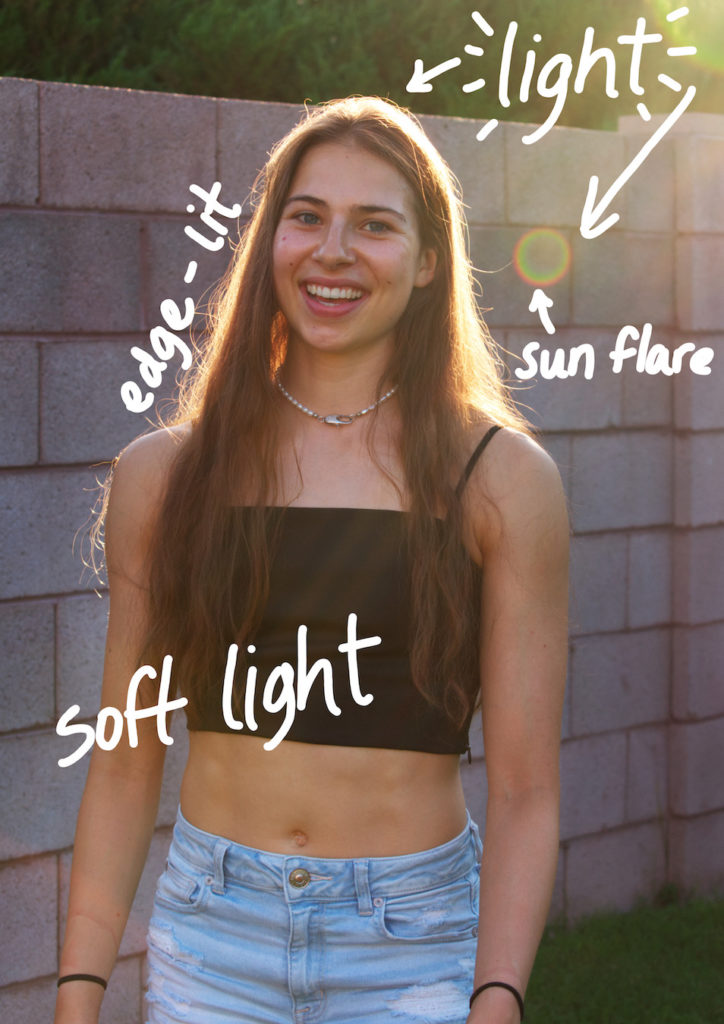
Backlight (feat. Sun Flare)
ISO 200, f/5.6, 1/250
Backlit/sun-flare photos are a popular way to shoot portraits because it gives the subject a halo, and the afternoon sunlight gives off cheerful vibes.
I love the combination of soft natural light and the golden edge-lit silhouette. It is important to get the right camera settings and angles during these style shots to avoid either excess grain or the blown-out and over-exposed look.
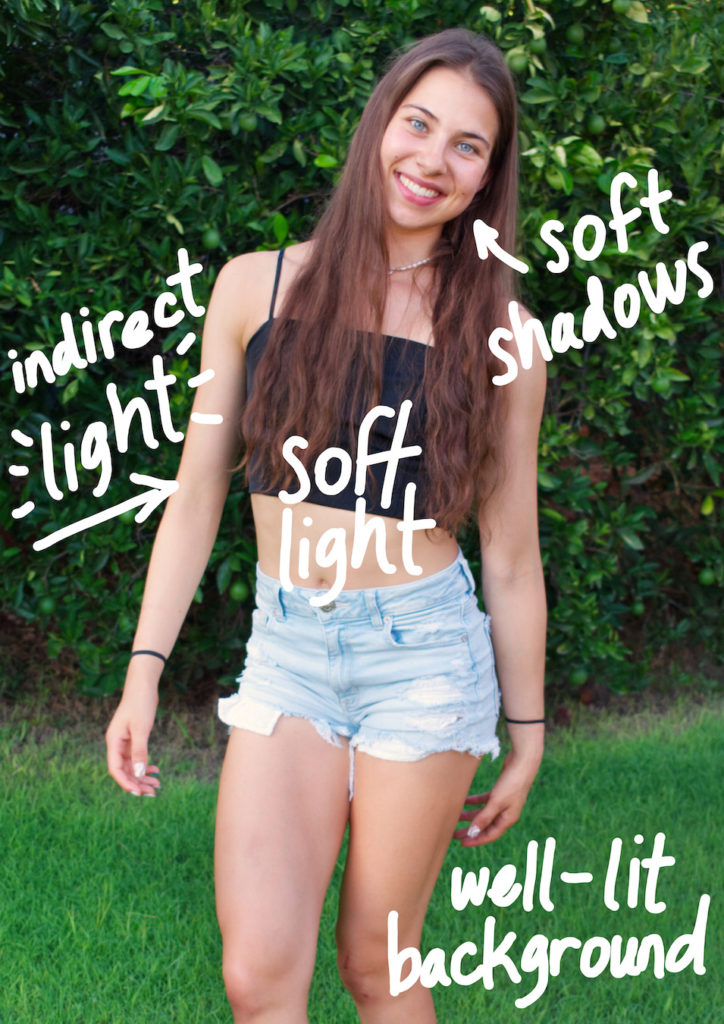
Soft, Indirect Light
ISO 400, f/4.2, 1/250
Overall soft, indirect light makes a classic, well-lit photo. As you can see, Taylor is evenly lit, with light and soft shadows. Without the harsh contrast and shadows, her natural features stand out, and she is easy to see. This gives the image a commercial look, as opposed to something that is trying to be artsy.
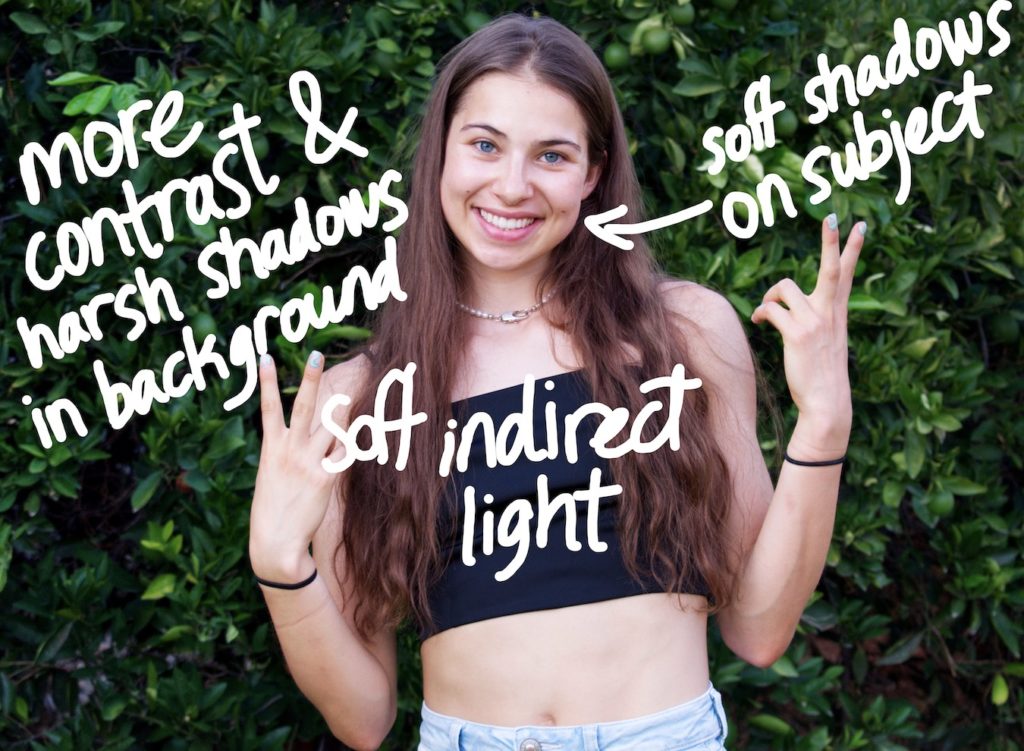
Separating the Background with Light
ISO 800, f/5.6, 1/200
In this picture, I had Taylor stand closer to the camera, framed with a background that had been completely shaded. Again, the indirect light (from the left behind the camera) evenly lights Taylor, but the added effect of the dark background creates an element of separation. This separation draws the focus intentionally to her. It is a great example of how light can manipulate the way the image is viewed.
This project helped me get more comfortable with shooting outside with changing light. I liked seeing what the different angles and the direction of light can contribute to an image. Overall, it was fun and great practice!
4 thoughts on “Shooting Outside: How to Light the Subject”
Taylor Hall
I love this!! So informative and ur the best photographer evaaaa
I love this!! So informative and ur the best photographer evaaaa
Thanks Taylor!!!
Great information! This will really help a lot of us amateurs out.
Thanks Chris!!!