With my studio finally up, I spent this week learning about lighting setups. Similar to last week’s post about natural lighting, positioning of light sources alters the vibe completely.
Shadows create drama, scenery and heightened composition. In the movies, lighting has always played a huge role in establishing characters and setting the scene. The entire genre of film noir was stylized by the use of shadow to create a sense of mystery and cynicism. I don’t want my coffee looking cynical, but I did manage to achieve this look and many others!
Lighting a subject can be done in several different ways; none of them are wrong, but each one may be more preferable depending on the situation. Soft shadows and an evenly lit background and foreground? Fabric softener. Harsh, intentional shadows? Skincare or makeup. Bright background and a dark and bold subject? Food.
Here are a few ways to play with lighting direction, shadows, and mood in the studio:
Window
This extremely complicated lighting technique involves an open window and an open mind. The light here drifts in from the right side, casting a soft shadow on the left side of the image. The shape of the light hitting the background creates some interest, but the viewer craves something different. Here, you might think too dark, too unbalanced, too natural. I agree. That is why I made a studio.
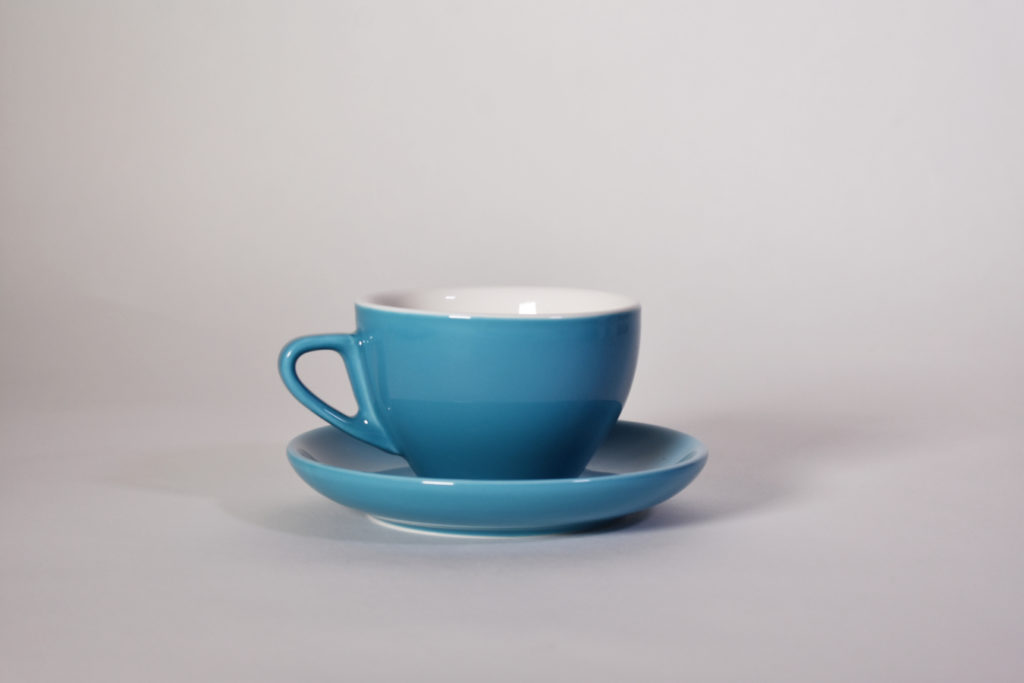
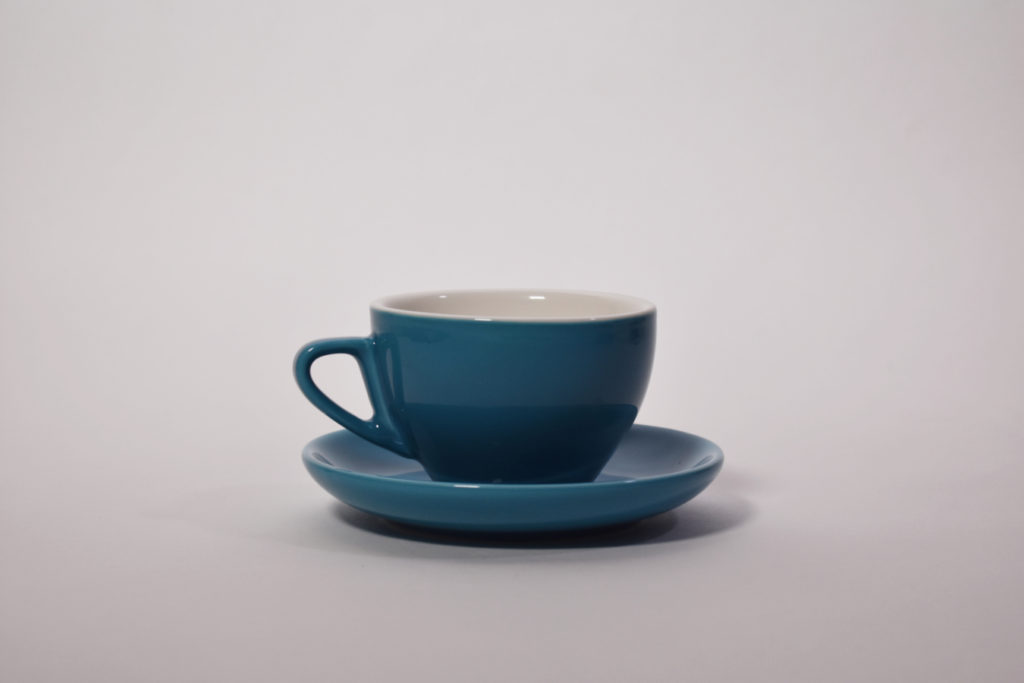
Soft Light
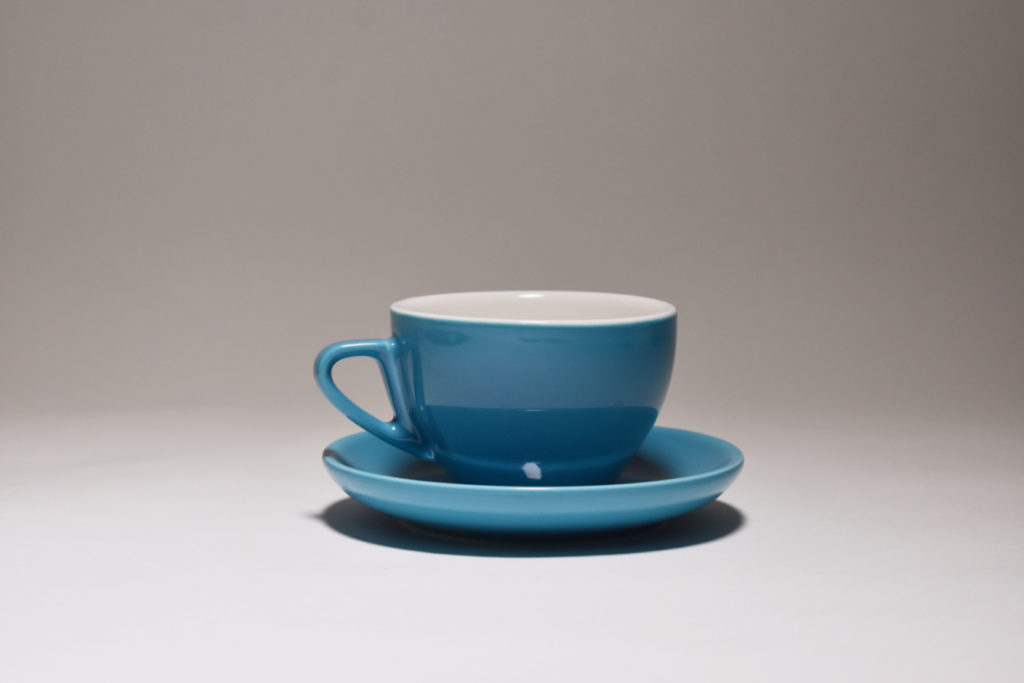
A coffee cup is essentially a half-sphere. The round sides end up getting lit much like a sphere, including shadows, highlights, cast shadows, and specular highlights.
Here, the cup and saucer are lit with only a large, diffused light. This soft lighting wraps around the coffee cup, avoiding extremely harsh shadows. The dark shadows on the right side of the cup have to do with the direction from which the object is being lit. This style of lighting is the closest to “natural light” I could get inside. The image says “I am a coffee cup”. Nothing more. Nothing less.
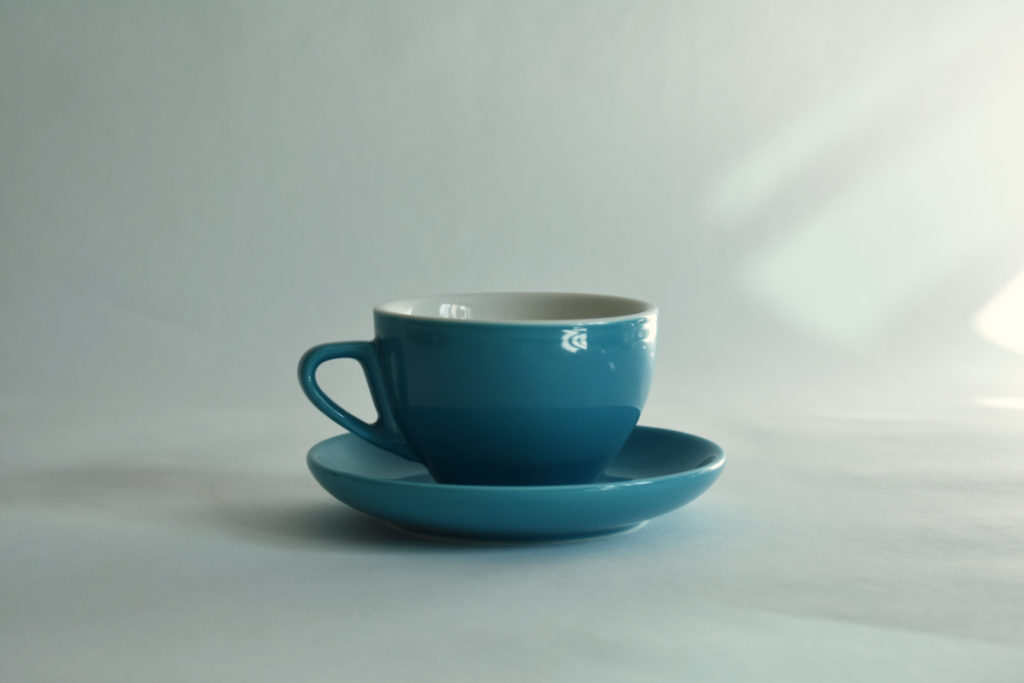
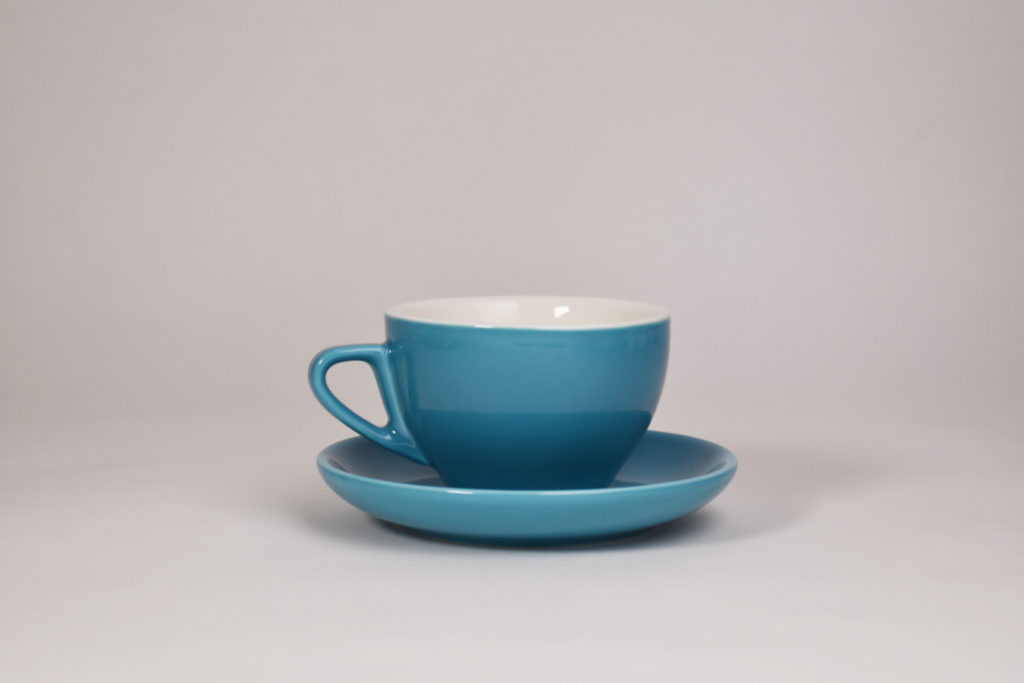
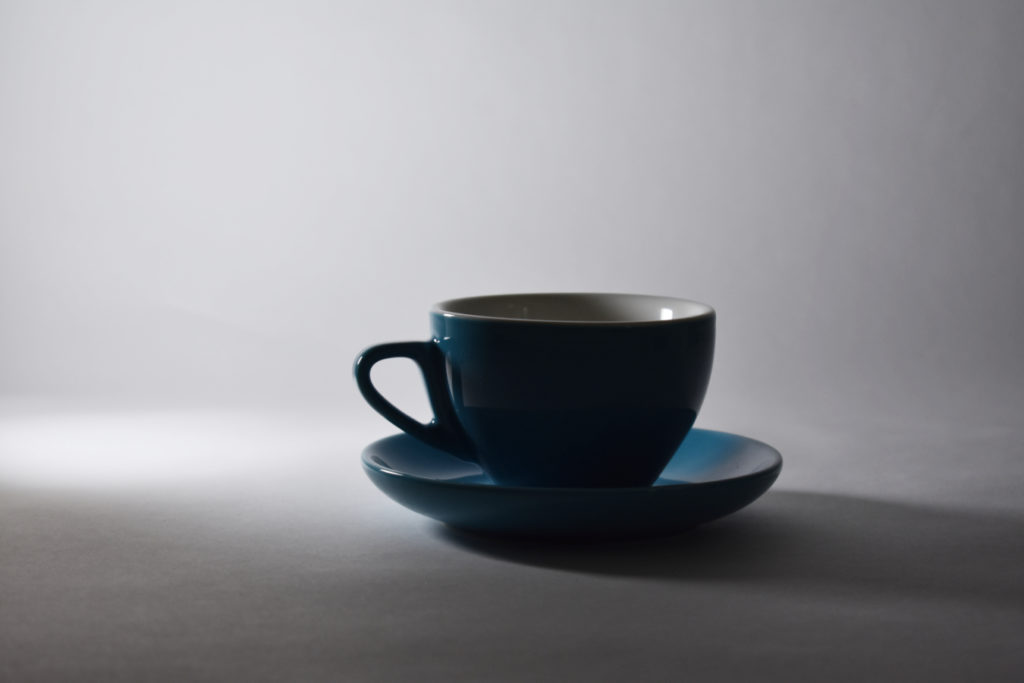
Hard Light
Now, this coffee cup looks like it’s up to no good. A single-source harsh light coming from right of the camera produces a dark, elongated cast shadow. The highlights on the foreground are also a bit brighter.
Harsh light can be used for a “spotlight effect” to make an object look important. Lots of skincare or makeup campaigns are being shot like this to incorporate some visual interest. I have found that this style of photo works really well when there are more than one object in the frame.
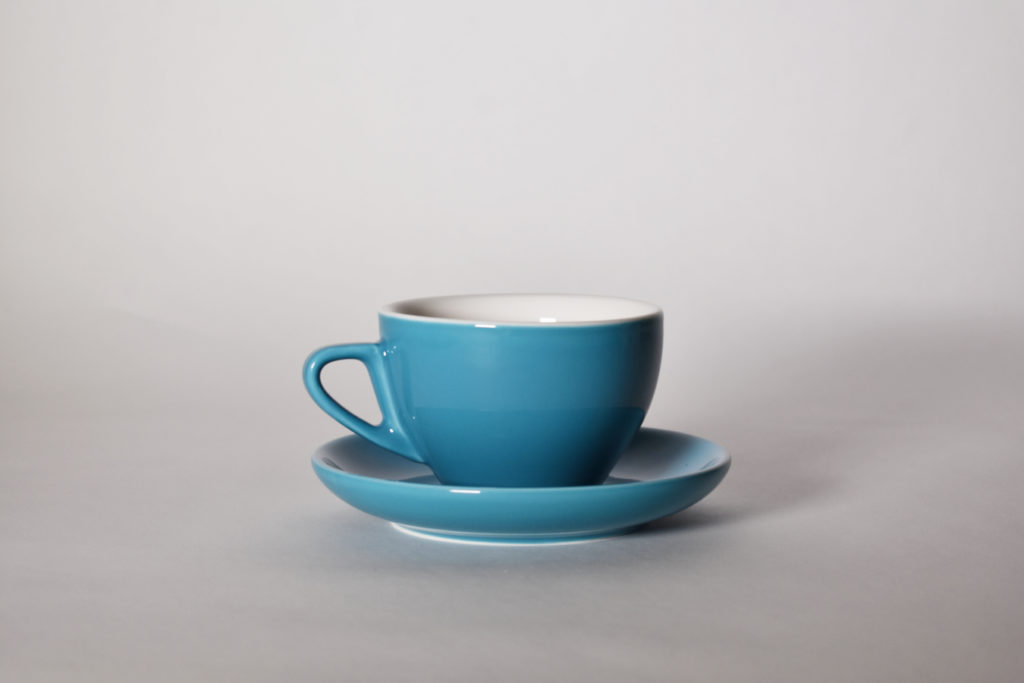
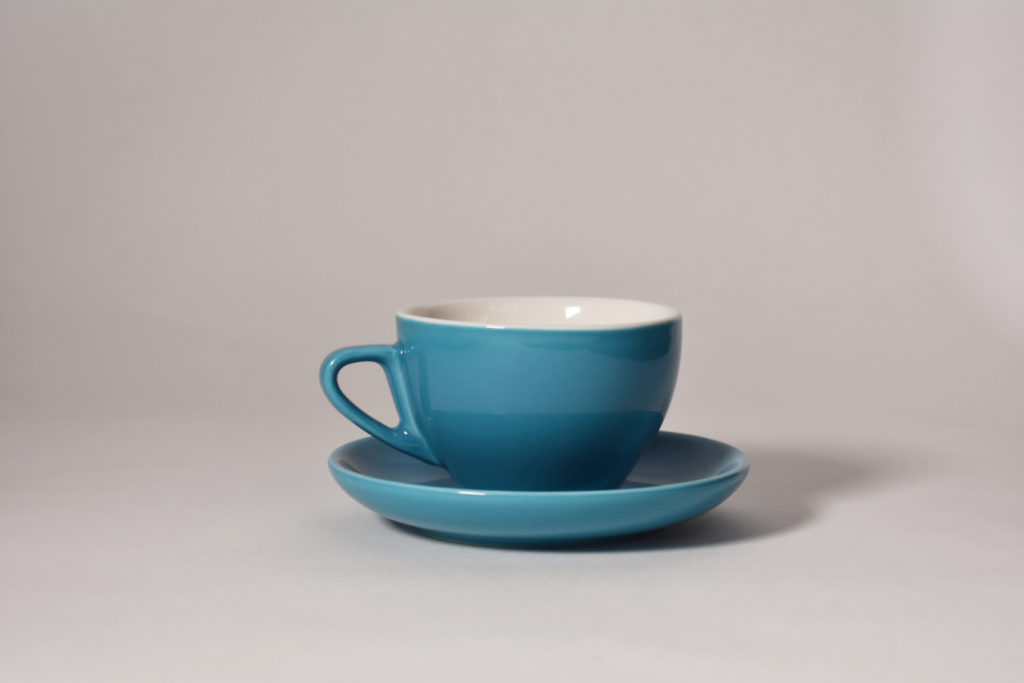
Soft/Harsh Power Couple
Here we have both the soft and harsh lights illuminating the cup from both sides. The harsh light is narrower, resulting in the right side of the object remaining in the shadows. However, it does work to bring out the edges of the cup and saucer. By highlighting small details on the subject and evening the light of the background, the image looks as though it is starting to come together.
This setup is the standard starting place for lighting in a studio. You will soon see how small directional changes of each light individually changes the mood.
For now, no drama here- just a stable and secure relationship.
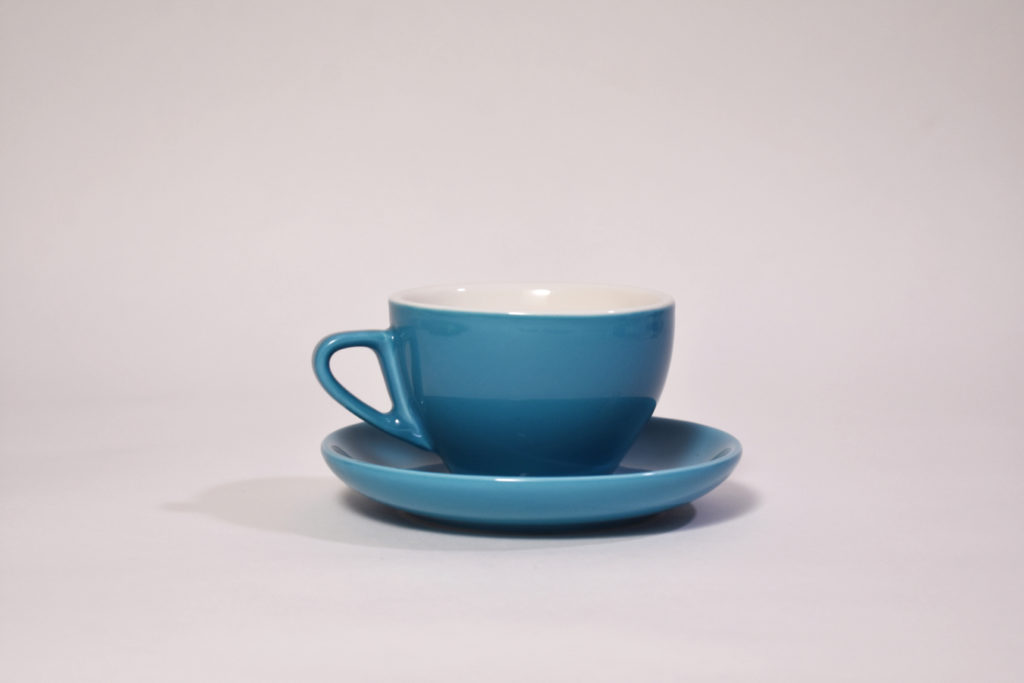
Using Black and White Reflectors
Black or white foam boards are used to reflect light, allowing you to direct it towards or away from a part of the setup. White boards, if placed near shadows, can brighten up a shadow, making it seem less harsh or disappear completely. Black foam boards can be placed near shadows to reflect back onto them. This makes the shadows darken and become more apparent.
A white reflector is used to brighten the case shadow.
A black reflector is used to darken the case shadow on the right.
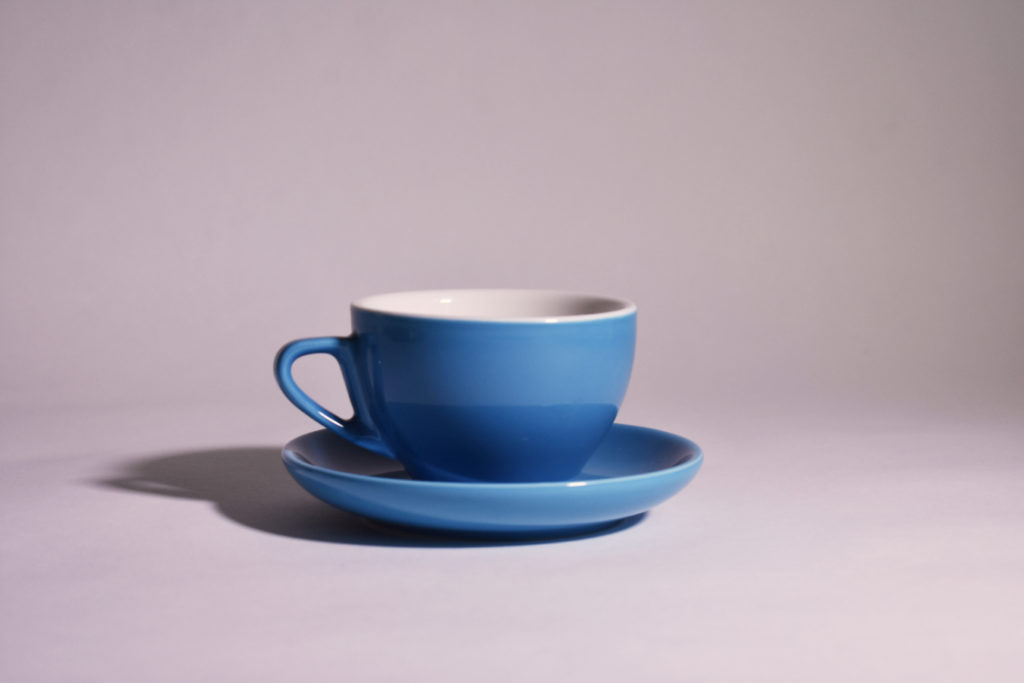
Indirect Light: Lighting the Foreground
You can see that, in this image, the cup and saucer have smaller cast shadows. I lit the foreground by placing the light completely perpendicular to our view of the coffee cup. This spread the light over all the foreground elements.
Sometimes, lighting the foreground separates the background by making it darker. I was not able to get that to happen, but you get the picture.
Indirect Light: Lighting the Background
When lighting the background, the subject is pulled closer to the forefront of the image. It brightens up the mood and the environment around the subject, while making the subject itself appear intense and suspicious.
This style works well if you have other, smaller lights to fill in the subject a bit. Again, use your imagination here.
Light the Background Separately
This has got to be the scariest fucking cup of coffee I’ve ever seen.
Completely separating the background and casting a shadow over the entire foreground creates a silhouette. This is highly stylized, and is just an example of one lighting technique which, combined with others, can contribute to a great lighting setup.
Putting some soft indirect light on the cup would make it visible, while the image still has the interesting element of background/foreground separation. I am particularly drawn to the heavy line of the cup handle against the brightly lit backdrop. I don’t know why, I just am.
Top-Down
This cup of joe is certainly not playing around. She is a high-profile CEO. She has a no-nonsense personality. If National Geographic did a spread on empty coffee cups, this would be it.
Or is it a lonely cup of coffee? It’s up to you. Light coming down from the top is harsh, pulling the shadows down. This alters our perception of the shape and size of the object.
This either creates a serious or a melancholy feeling. I haven’t decided yet, but I do like the range of value. The background and foreground are visually separated, and the cup has bold characteristics.
Subtle changes in light can make all the difference. I am used to using just natural light, but these techniques will upgrade the quality of my photos for some upcoming projects!